


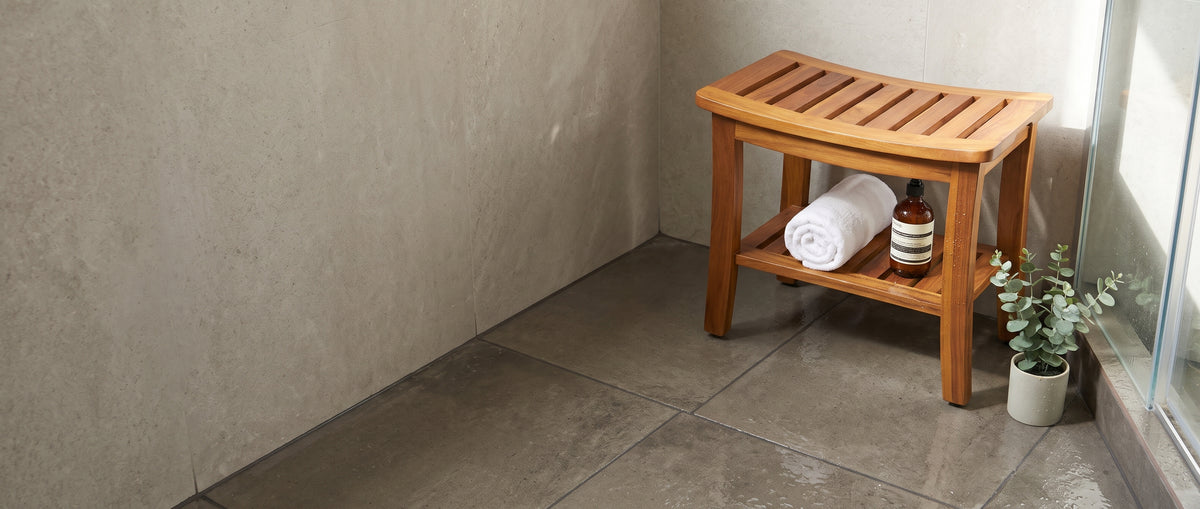
Your teak shower bench arrived a warm honey-gold. Months or years later, it has turned silver-gray, maybe a little blotchy, maybe rough to the touch. Has it been ruined? Almost certainly not. On solid natural teak, that gray layer is a thin surface change. Underneath, the wood is the same dense, oily teak it always was, and a weekend of gentle work can bring the color back.
This guide explains why teak turns gray, how to decide whether to restore it, and exactly how to clean, dry, sand and oil a weathered teak shower bench without damaging it. It also covers what to do with a rustic gray bench, how to handle common problems, and how to keep the color once it is back. For day-to-day maintenance, see our main guide to caring for a teak shower bench.
The quick version
- Decide whether you want to restore the color or keep the silver patina.
- Clean the bench with mild soap, warm water and a soft brush. Treat dark mildew spots with diluted white vinegar.
- Dry it completely, ideally for 24 to 48 hours.
- Sand natural teak lightly along the grain with 220-grit sandpaper until fresh wood shows. Do not sand rustic gray finishes.
- Wipe off all dust.
- Oil with a thin coat of teak oil, wait about 15 minutes, then wipe off all the excess.
- Cure for 24 hours before using it in the shower.
- Maintain with a rinse after use and a thin coat of oil every two to three months.
Why teak turns gray
All wood exposed to water and light changes at the surface. Researchers who study wood weathering, including scientists from the USDA Forest Service, describe the process this way: light breaks down lignin, the natural glue that binds wood fibers, in the outermost layer of the wood. Water then washes the degraded material away. What is left is a thin, gray, slightly rougher layer of cellulose fibers.
Teak goes through the same process as other woods. Because it is dense and rich in natural oils, though, it resists the deeper decay that often follows weathering in other species. That is why an old gray teak bench is usually still solid and sound.
In a shower, water and soap gradually wash out some of the natural oils at the surface, and bathroom light, plus sunlight through a window, adds to the effect. Outdoors, sunlight speeds the change considerably.
The important point: graying on natural teak is cosmetic. It does not mean the bench is weak, rotting or unsafe. Restoring the color is a choice, not a repair.
Should you restore it or keep the patina?
Some people love silver-gray teak. It is the classic look of weathered boat decks and coastal furniture, and it suits minimalist and Scandinavian bathrooms. Others prefer the warm honey tone it had when new.
| Keep the silver patina if | Restore the golden color if |
|---|---|
| You like the weathered, coastal look | You prefer the warm, honey-gold tone |
| Your bathroom palette is gray, white or cool-toned | Your bathroom has warm woods, brass or cream tones |
| You want the least maintenance | You are happy to oil every few months |
| The surface is smooth and even | The surface is blotchy, rough or stained |
If you keep the patina, you still need to clean the bench regularly. Gray teak is not the same as dirty teak. Soap film, mildew spots and mineral deposits should still come off.
Before you start: assess the bench
Take five minutes to check the bench before you restore it.
1. Confirm it is natural solid teak. These steps are for solid natural teak. If your bench has a factory-applied colored finish, such as TeakCraft's rustic gray, sanding will remove that finish. If you are not sure whether your bench is solid teak at all, our guide to solid teak vs teak-finished wood can help.
2. Check the structure. Press on each corner and the seat. Look for loose joints, cracks running through legs or rails, or wood that feels soft. Restoration fixes the surface, not the structure. If the bench is structurally damaged, stop using it.
3. Check the feet. Make sure the rubber feet are intact and the bench sits level. Note any feet that need replacing.
4. Identify any stains. White chalky marks are usually hard-water deposits. Black specks are usually mildew on surface residue. Grayness is weathering. Each gets slightly different treatment below.
What you need
- Mild dish soap and a bucket of warm water
- A soft-bristle brush and an old soft toothbrush
- Distilled white vinegar, for mildew spots
- Sandpaper in 220 grit (a sanding block or sponge makes it easier)
- Lint-free cloths or microfiber towels
- A tack cloth or slightly damp cloth for dust
- Teak oil
- Disposable gloves
- A dust mask if sanding indoors
- Old towels or a drop cloth to protect the floor
A note on chemical teak cleaners: some products sold for restoring outdoor teak use strong acids or alkalis. TeakCraft's care instructions call for mild soap and diluted vinegar instead, and we recommend starting there. Harsh chemicals can strip natural oils, raise the grain and leave uneven color.
Safety note on oily rags. Cloths soaked in oil-based finishes can heat up and catch fire on their own as they dry. After oiling, lay used rags flat outdoors to dry, or place them in a sealed metal container filled with water, and follow the disposal instructions on your oil's label.
Step 1: Move the bench and set up
Take the bench out of the shower if you can. Work outdoors in shade or in a well-ventilated garage or bathroom. Direct sun can make oil dry unevenly. Lay down a drop cloth.
Step 2: Clean thoroughly
Restoration starts with a clean surface. Sanding a dirty bench just grinds soap and grime into the fresh wood.
- Rinse the bench with warm water.
- Mix a few drops of mild dish soap into warm water.
- Scrub every surface with a soft brush, moving along the grain: seat top, slat edges, gaps between slats, legs, shelf and underside.
- Use the toothbrush for joints and the spaces between slats.
- Rinse well with clean water.
Avoid bleach, ammonia, steel wool, abrasive powders and pressure washers. They can strip the wood, raise the grain and leave a blotchy finish.
Step 3: Treat mildew and mineral spots
Dark mildew spots. Scrub with a mix of 1 part white vinegar to 4 parts warm water and a soft brush, then rinse well. This is the ratio TeakCraft recommends.
White hard-water marks. The same diluted vinegar helps dissolve mineral film. Let it sit for a few minutes, scrub gently and rinse. For a full walkthrough, see our guide to removing soap scum and hard-water stains from teak.
Any faint marks that remain will usually disappear during sanding.
Step 4: Let it dry completely
This step is easy to rush and important to get right. Sanding damp wood clogs sandpaper and raises fibers, and oil will not penetrate wet wood properly.
Let the bench dry for at least 24 hours, and up to 48 hours if your climate is humid. Stand it where air can reach every side. The wood should feel completely dry and look evenly light in color before you sand.
Step 5: Sand lightly along the grain (natural teak only)
Sanding removes the thin gray layer and reveals fresh, golden wood underneath. Solid teak is the same wood all the way through, so a light pass is usually all it takes.
- Use 220-grit sandpaper. This is the grit TeakCraft recommends. It is fine enough to avoid deep scratches and coarse enough to remove a weathered surface. Wrap it around a sanding block or use a sanding sponge for even pressure.
- Always sand with the grain. Look at the lines in the wood and move along them, never across or in circles. Cross-grain scratches show up clearly once oiled.
- Keep the pressure light. Let the paper do the work. You are removing a thin surface layer, not reshaping the bench.
- Work slat by slat. Sand the top face, then the edges, then the sides of each slat. Use a folded piece of sandpaper for the gaps between slats.
- Do the legs and shelf. Sand the frame and shelf the same way. Pay less attention to the underside unless it is visibly weathered.
- Stop as soon as the color is even. When the gray is gone and you see consistent golden-brown wood, move on. Over-sanding thins the slats without improving the look.
A power sander can be used on flat seat surfaces, but it is easy to remove too much wood or leave swirl marks on a small bench. For most shower benches, hand sanding gives a better result.
Stubborn dark spots. If a dark spot remains after cleaning and sanding, it may have penetrated slightly deeper. Sand that spot a little more, still with the grain and with light pressure. Very old stains sometimes leave a faint shadow, which usually blends in after oiling.
Step 6: Remove all dust
Dust left on the surface mixes with oil and dulls the finish. Brush off loose dust, then wipe every surface with a tack cloth or a slightly damp lint-free cloth. Let any dampness dry before oiling. Check the gaps between slats, where dust collects.
Step 7: Apply a thin coat of teak oil
Teak oil replenishes the surface oils that water and soap have washed out. It brings out the wood's warm color and helps water bead on the surface.
- Shake or stir the oil according to its label.
- Apply a thin, even coat with a soft cloth, working along the grain.
- Cover every surface: top, edges, legs and shelf.
- Wait about 15 minutes so the oil can soak in.
- Wipe off all the excess with a clean cloth. This is the most important part. A thin coat that has soaked in is far better than a thick one sitting on top, which stays sticky and can make the seat slippery.
- Inspect in good light. If any area looks dry or patchy after wiping, you can apply a second thin coat after the first has dried, following the label's timing.
Always read the oil manufacturer's instructions, including drying times and safety warnings, and remember the oily-rag precaution above.
Step 8: Let it cure before using it
Let the bench cure for at least 24 hours before it goes back into the shower. This prevents the seat from feeling slick and gives the oil time to set. Keep it somewhere dry, dust-free and well ventilated.
When you put it back, check that it sits level and steady on its feet.
What about rustic gray teak?
TeakCraft's rustic gray benches, including the Lavici, Luni, Ricina, Cosima and Elera, have a hand-applied gray finish over solid teak. That finish is part of the design, so these benches are restored differently.
- Do not sand. Sanding removes the gray finish and exposes natural wood underneath, leaving patches.
- Clean gently. Use mild soap, warm water and a soft brush. Treat mildew with the 1:4 vinegar mix, spot-testing first on the underside.
- Oil the same way. TeakCraft recommends the same thin coat of oil every two to three months for rustic gray benches. Wipe off the excess and cure for 24 hours.
- Expect natural variation. The gray finish is hand-applied over natural wood, so tone and grain vary slightly. Small shifts over time are normal.
If a rustic gray bench has a specific problem you cannot solve with gentle cleaning, contact TeakCraft before trying anything more aggressive.
Troubleshooting common problems
| Problem | Likely cause | Fix |
|---|---|---|
| Sticky or tacky surface after oiling | Too much oil left on the surface | Wipe firmly with a clean cloth; let it cure longer; use thinner coats next time |
| Blotchy color after oiling | Uneven sanding or leftover residue | Clean, dry, lightly re-sand the blotchy area along the grain, and re-oil thinly |
| Fuzzy, raised grain | Sanding damp wood, or water raised fibers | Let dry fully, then a very light pass with 220 grit |
| Scratches visible after oiling | Sanding across the grain | Re-sand those areas with the grain, wipe and re-oil |
| Gray returns within weeks | Bench stays wet; heavy sun exposure; no maintenance | Improve ventilation, rinse after use, oil every two to three months |
| Dark spots return | Mildew growing on soap residue | Rinse after each use; run the fan; treat with diluted vinegar |
| Seat feels slippery | Oil not cured, or excess left on | Wipe off excess and wait the full cure time |
Restoring an outdoor teak bench
TeakCraft benches are labeled for indoor and outdoor use, and many people move a bench to a patio, pool deck or outdoor shower. Outdoors, sunlight speeds graying, and pollen, leaves and dirt add to the grime.
The same restoration steps apply. Outdoors you may need to repeat them more often if you want to keep the golden color, because sunlight is a much stronger driver of weathering than indoor light. Many people choose to let outdoor teak go silver and simply keep it clean.
For seasonal advice on patio pieces, read our guide to caring for teak outdoor furniture through every season.
Keeping your bench restored
Once the color is back, a few habits keep it that way.
- Rinse after every shower to remove soap before it dries.
- Let it dry: leave the door or curtain open and run the fan for 15 to 20 minutes.
- Wash every two to four weeks with mild soap and a soft brush.
- Oil every two to three months with a thin coat, wiped off after 15 minutes and cured for 24 hours.
- Check the feet every few months and replace any that are cracked or worn.
For the full routine, see our teak shower bench care and sealing guide. For the bigger picture of what keeps teak going for years, see how long a teak shower bench lasts.
How long does restoration take?
Most of the time is waiting, not working. Plan for a weekend so the bench can dry and cure properly.
| Stage | Hands-on time | Waiting time |
|---|---|---|
| Clean and treat spots | 20 to 40 minutes | None |
| Dry | None | 24 to 48 hours |
| Sand | 30 to 60 minutes, depending on size | None |
| Remove dust | 10 minutes | None |
| Oil and wipe | 15 to 20 minutes | About 15 minutes before wiping |
| Cure | None | At least 24 hours |
A typical schedule: clean on Friday evening, sand and oil on Sunday morning, and the bench is ready for Monday evening's shower.
Restore or replace? A quick decision guide
Restoration fixes the surface. It cannot fix a failing structure. Use these questions to decide.
- Is the frame solid? Press on the seat and each corner. If joints are tight and nothing flexes, restoration is worthwhile.
- Are any legs or rails cracked through? A crack that runs through a structural part is a safety issue. Replace the bench or have it professionally repaired.
- Does any wood feel soft or crumble? Soft spots suggest decay from long-term trapped water. Replace the bench.
- Do the feet still work? Worn feet can usually be replaced. Ask the seller about replacements.
- Is the problem only color, roughness or stains? Then restoration is exactly the right fix.
If the answer to the first question is yes and the next two are no, restore it.
Restoration mistakes to avoid
- Sanding a bench that is still damp. It clogs paper, raises fibers and gives an uneven finish.
- Starting with coarse sandpaper. Coarse grits leave scratches that show clearly once oiled. TeakCraft recommends 220 grit for light restoration.
- Sanding across the grain or in circles. Always follow the grain.
- Leaving excess oil. Thick oil stays sticky, attracts dirt and can make the seat slippery.
- Rushing the cure. Using the bench before it has cured for 24 hours can leave the seat slick.
- Sanding a rustic gray finish. It removes the finish. Clean and oil only.
- Using varnish or polyurethane. Film finishes can crack in a humid shower and trap water.
- Throwing oily rags in the trash. Lay them flat outdoors to dry or store them in a sealed metal container with water, and follow the oil label's disposal guidance.
Keeping a restoration log
It sounds fussy, but a simple note on your phone saves guesswork. Record the date you restored the bench, the oil you used, and when you last oiled it. Set a reminder for two to three months later. Over a year, you will see how quickly your bathroom weathers teak and can adjust your routine.
Frequently asked questions
Is gray teak damaged?
No. Graying is a surface change caused by water and light. The wood underneath is unaffected, and on natural teak the color can be restored by cleaning, light sanding and oiling.
Can I restore teak without sanding?
Cleaning and oiling alone will improve the look of lightly weathered teak, but sanding is what removes the gray surface layer. For rustic gray benches, clean and oil only.
What grit sandpaper should I use on teak?
TeakCraft recommends 220 grit for light restoration. Sand only along the grain.
Should I seal my teak shower bench with varnish or polyurethane?
No. Film finishes can crack in a humid shower and trap water. Teak oil, applied thinly, is the recommended treatment.
How often should I restore my bench?
Full restoration is occasional, when the color fades or the surface becomes rough. Regular oiling every two to three months reduces how often you need it.
Can I make my teak bench gray on purpose?
Yes. Simply stop oiling and keep the bench clean. Natural teak will gradually weather to silver-gray.
The bottom line
A weathered teak shower bench is rarely a lost cause. On solid natural teak, the gray is skin-deep: clean it, let it dry, sand lightly with the grain, oil thinly, wipe off the excess and let it cure. On rustic gray benches, skip the sanding and clean and oil instead. Then keep up a simple rinse-and-dry habit, and the warm color will stay with you much longer.
If your bench is beyond restoration, or you are ready for a second one, browse TeakCraft's solid teak shower benches. The 30-inch Liv and the 21-inch Hermod are both natural teak and arrive fully assembled.
Share:
What to Look for When Buying a Quality Teak Shower Bench
Solid Teak vs Teak-Finished Wood: How to Identify the Difference